

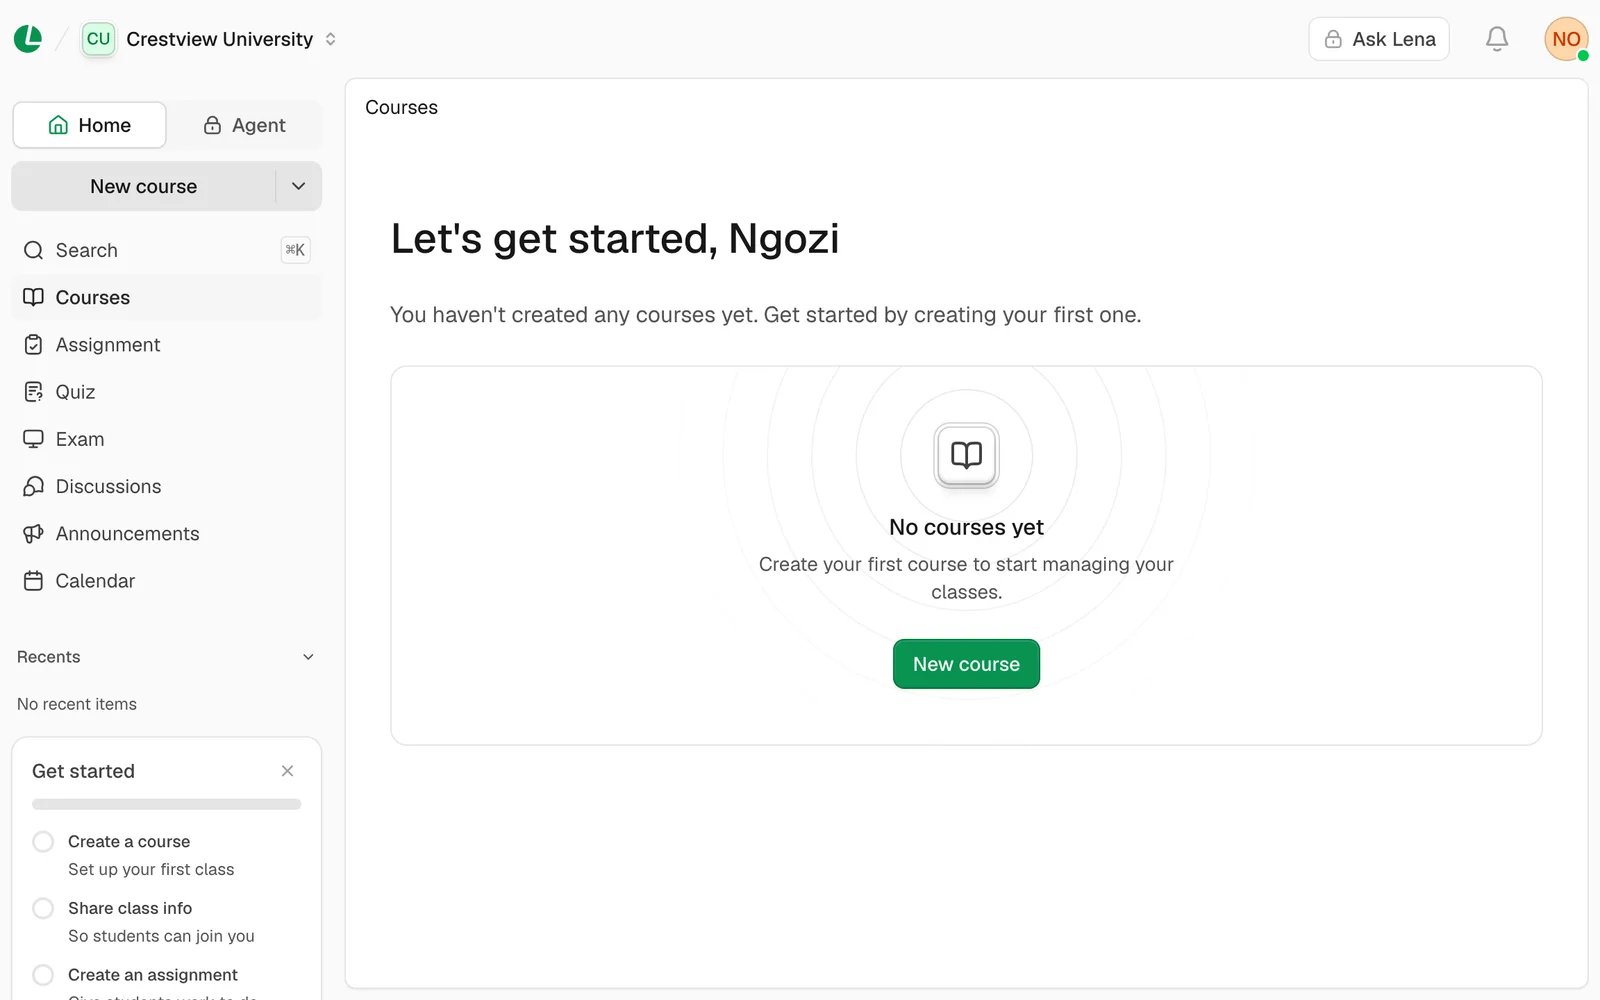
Your courses, the first time you open your school.
Find your way around
The sidebar, from top to bottom:- Home | Agent: switches between your courses and Lena Agent. If your school doesn’t have Lena Agent yet, the Agent side shows a lock. Student assistants don’t see this switch.
- New course: starts a course. The arrow beside it opens New assignment, New quiz and New exam.
- Search: finds courses, work, files, outlines and students. Press ⌘ K (or Ctrl K) from anywhere. See find anything.
- AI Agent, Courses, Assignment, Quiz, Exam, Discussions, Announcements and Calendar. A red number on Courses counts the course invitations waiting for you. You only see the sections your role uses.
- Recents: the courses and work you opened last on this device.
- Get started: a short checklist for your first week. See get started.
- Your school’s name: switches to another school you teach at.
- Ask Lena: ask Lena Agent about the page you’re on. See Ask Lena.
- Inbox: the bell. Work to grade, replies, announcements and course news land here. See notifications.
- Your picture: the account menu, with What’s new, Settings, Send feedback, Support and Log out.
How a course runs
Every course goes through the same steps.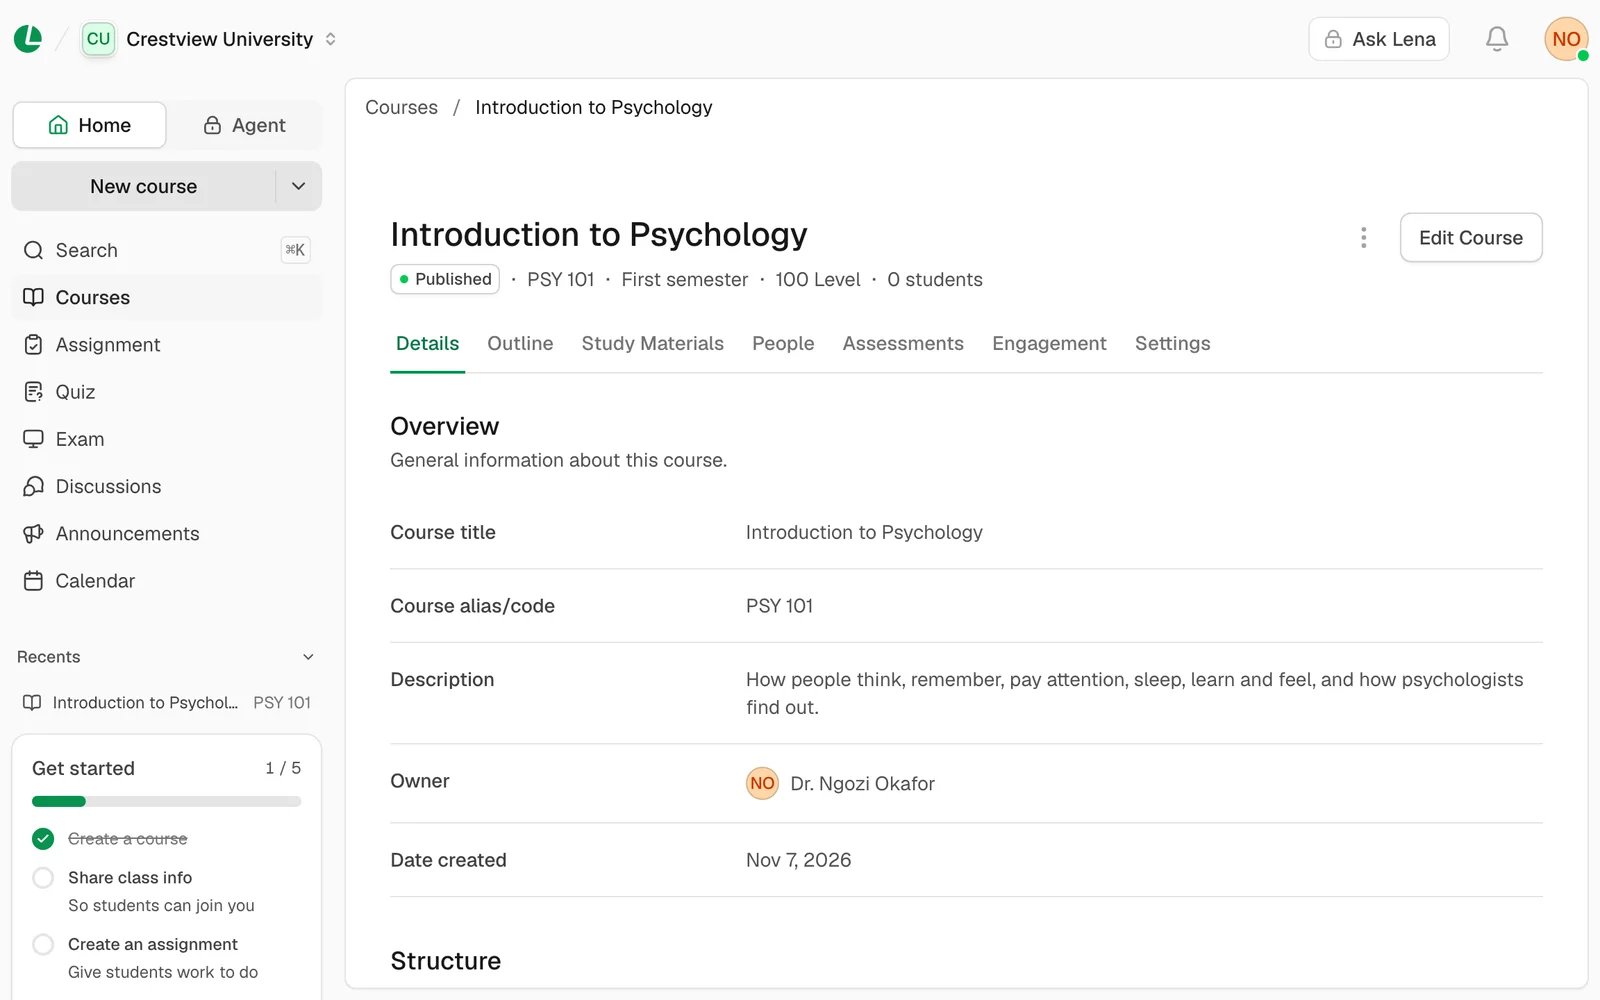
A course’s page: its tabs hold the outline, materials, people and grades.
1. Create a course
Name it, give it a code and place it in your school. It starts as a draft.
2. Publish it
Choose who can join, set the grade breakdown, and share the entry code.
3. Add materials
Upload notes and slides, add links, and write the course outline.
4. Set work
Assignments, quizzes and exams, as drafts until you publish them.
5. Grade
Mark submissions, with or without a rubric.
6. Release results
Students see their grades once you release them.
7. End the course
Make it read-only at the end of term, then duplicate it for next time.
Keep in touch
Announcements, discussions and your class schedule.
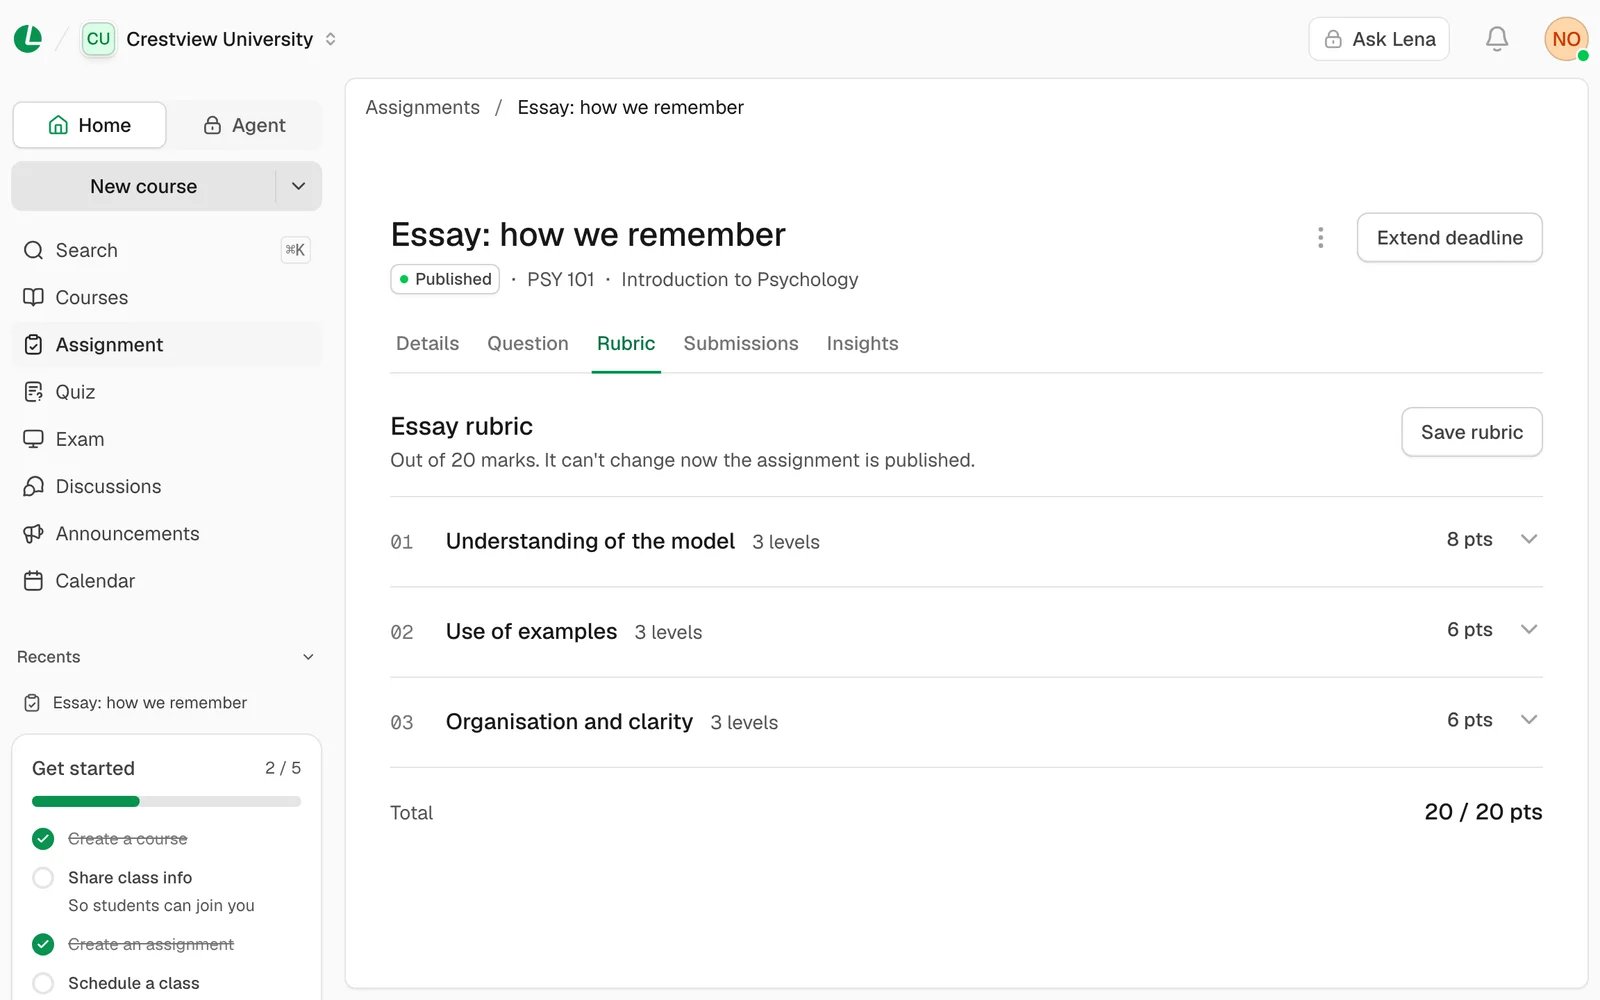
A published assignment, ready for students to hand in work.
Good to know
- Roles are per course. You can own one course and help on another as an assistant. What you see depends on your role on each. See people and roles.
- Words follow your school. A K-12 school sees “Subject” instead of “Course”, and “Scheme of Work” instead of “Course Outline”. See words your school uses.
- Offline, you can look but not change. Pages you’ve opened before still open, with your courses, people, submissions and gradebook as last saved. Grading, releasing and creating need a connection. See phones and offline.
Next
Get started
Sign up, join your school and work through the checklist.
Create a course
Set up your first course.